Showing posts with label pinterest. Show all posts

Monday, August 13, 2012

JOY

I talked about my new bff yesterday...Glossy Accents! I honestly do not know where this has been all my life. Did everyone else keep this secret from me?
My sister went back to college on Friday. I decided to incorporate my new found love into something she could use to spruce up her dorm room. I asked her what her favorite fruit of the spirit was and she picked JOY...thankfully the one with the least amount of letters!
Supplies
Glossy Accents
glitter
letters
glue
paint brush
ribbon
hot glue gun
Step 1: Apply a thin layer of glue to one letter at a time. Pour glitter on the letters and tap off any extra.
 Step 2: Outline the glittery letter with glossy accent.
Step 3: Fill in the letter that you just outlined with glossy accents. If any bubbles appear pop them with a needle or drag them to the edge of the letter. The letter will look cloudy, but once the glossy accents dries it is clear, smooth and shiny. 
Step 4: Repeat step one through three with each of the letters and then let them dry over night.


Monday, August 6, 2012

Yarn Art Mural

This Monday made-it takes us into the classroom. I have a concrete block wall that is not eye appealing. I found this idea via pinterest...a.k.a the website that is stealing everyones creativity.
Supplies:
Yarn
Clear command hooks and strips
Letter cut-outs
scissors
Step by Step
1. Pick your color yarn. The darker the color the more the letters will show up. For the command strips I bought one pack at a time with 40% off various craft stores (Michael's, Hobby Lobby, Jo-Ann Fabric). I used around 141 command hooks. Each corner of a letter needs a command hook.
2. Either print out your letters or draw them yourself. I did a mixture of drawing and printing the letters. The bigger the better.
3. Tape up all your letters to see how you like the placement.
4. Start with one letter at a time. Stick on a command hook on each of the letters corners.
5. Once all that letters command strips are on start wrapping the yarn on the hooks. I wrapped each letter around about four times. The more times the thicker the letter will look. I used one continuous strand of yarn and did not cut the yarn until all the words were done.
5. Continue with each letter. Sticking on command strips and wrapping the yarn.
6. When all the words are complete I draped each color yarn to connect to one another. Then cut the yarn.

Sunday, July 29, 2012

Instagram ribbon banner

First off I love this project for many reasons:
1. the pictures capturing memories from last year
2. the life that it will add to the cement block walls
3. the colors
4. the movement that happens when the picture twirl and ribbons sway
5. It took little time to assemble
I discovered you can print your instagram pictures via Printstagram
{warning: expect to wait 4 weeks for the pictures to be delivered}
On a positive note the prices are reasonable. I also purchased a mini book of all the photos.
I picked the same ribbons that matches the banners I created last year. Speaking of the motivational banners...they had a little plastic surgery on Friday. Last year I did not have the time or patience to back the banners with fabric. Therefore exposing what I did not finish. I put off covering the back with fabric until summer. Thankfully, I had enough fabric left over to cover the backs. They look so much better now that they are 100% complete.
Both the banners and ribbon tassels will be going up in the classroom tomorrow.
{Pictures soon to follow}

Find me on instagram
@ helloitsmeg

Sunday, July 22, 2012

Book Frame

Another Monday Made it and of course this one was inspired by Pinterest
{shock}
I knew I wanted to make this book frame so my mom and I headed toward the Goodwill book store. We needed to find a sturdy old book that could with stand being cut into. We both found these old children's books to use.
Supplies:
3 cardboard rectangles varying in size (L, M, S)
hot glue gun
cutting board
exacto knife
old book
ribbon
pencil
letters
ruler
Step 1: Measure out three rectangles from a piece of cardboard. Going from large, medium and small. These will become your frame you will cute around for each section.
Step 2: Starting with the largest rectangle trace that shape on the cover of your book. Then start carefully cutting out the book cover. This will take time because you are cutting through cardboard. Use a steady hand as you do not want to cute outside of the outline. Once the cover is loose enough you will be able to pop it out. Some stray cardboard may be left on the edges, just cut it out.
Step 3: With the largest rectangle again you are going to use that as a guide and cut ten pages at a time. I put a thin cutting board underneath ten pages so I would not go any farther. Make sure you cut the corners out nicely as it may rip.
Step 4: Determine how deep you want each section to be. I ended up having each section 130 pages or so. After you finish with one section move on to the smaller rectangle until you have created your frame.
Step 5: After all the sections are cut out arrange your words how you would like them. I put my words on a separate sheet of paper and just taped it in...just in case I want to change the message in the future. You could also hot glue each of the pages together, but I like how then looked loose and such. I did hot glue the front cover to the first page. Oh and string a ribbon through the binding so you can hang it.

Monday, July 16, 2012

Dear Students,

Another Monday Made it inspired by the one and only Pinterest. When I saw this letter to students I knew it was a must for the classroom. I thought what a wonderful reminder for them (as well as myself) that I am here to support them even when it seems the opposite.
 Pretty simple projcet to put together

Supplies:
foam poster board from the dollar store
foam paint brush
paint maker
paint


Monday, July 9, 2012

Glitter smitter

Fourth of July was full of some extra sparkle with the help of some glitter.
I have been seeing this hall pass on Pinterest floating around and of course I decided to make one of my own. I am not too fond of writing students passes and this seemed like a simple solution. Pin a clothes pin on their collar and they are free to leave.
 Supplies
permanent maker
clothes pin
brushes
ribbon
wood
paint
I debated on the design and how to handle the letters
{paint, don't paint, dots, swirls, lines}
After a week I decided on zig-zags and letters I found at Michael's
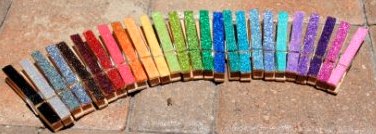
With the left over clothes pins I decided to cover them with glitter and put magnets on the back of them for use on the white board.
 I am not the biggest fan of glitter due to the fact that once you touch glitter it will stay with you. I learned a tip on how to keep the glitter off you hands. Once the glitter is dry cover the glittery surface with decoupage. The decoupage creates a seal on the glitter.


Monday, July 2, 2012

Ombre Chandelier

This was a tedious project to put it nicely
{only took a day and a half to assemble}
I came across this project on pinterest through the blog Hey Gorgeous. She does a wonderful job of step-by-step pictures for creating this ombre chandelier. Not only are the pictures helpful, but the directions as well.
Supplies
paint strips
Am I the only one who feels like I am commiting a crime when I take a handful of these. I picked various shades of green for my chandelier
 Lamp shade
I went to Good Will twice to find this scalloped shade. You will remove all fabric leaving just the metal rim.
Puncher-outer
{insert correct name here}

You will also need:
scissors
thread
ribbon
tape

Once all the paint chips are punched out start asembling each row. I layed mine out on the table color side down and taped them all together. The reason why I taped them together is so they will hang flat. Other wise they will go whatever way they please! I started with the bottom layer first and then started the top.
As you can see you are going to flip the lamp shade and work your way outward. I found tying each strand on was easier if the chandelier was hanging.
All in all this project turned out nicely. I am dreading transporting it back home and then to school as it is a tad bit delicate! As long as no one touches it or a strong wind does not come by we should be fine.


Monday, June 25, 2012

Fruit in a cup

In an attempt not to blow away and stay dry from tropical storm Debbie there have been several projects in the making; including one that can be eaten!
 The eaten treat was of course discovered through Pinterest
I thought these cupcake fruit pizzas were too cute and simple to make
Ingredients
Pillsbury pre-made sugar cookie dough you find in the refrigerator section
16 oz. of cool whip
8 oz. of cream cheese
various fruit
Roll the dough in to mini balls and press a tbs into the dough to make a cup
Allow the cups to cool and pop out the cookie cups.
While the cookies are baking mix the cool whip and cream cheese together until it is smooth.
 To reduce the amount of filing into the cup I put fruit in the bottom and covered them with the cool whip & cream cheese concoction
Add some fruit to the top and you are done!

Here is a sneak peak of a classroom project


Monday, June 11, 2012

Flying Book

Another project complete and I have a little confession to make: I tend to lean towards projects that need to hang from something.
{Oh well}
For this project, which was of course inspired by pinterest, required that I hunt down an old book. I went around from Goodwill to Goodwill in search of the perfect old book. I found a nice looking "Three Musketeers" book that the binding was all ready falling apart...which I was going to remove any ways.
Supplies
Old book
exacto knife
hot glue gun
clear string
scissors
There was a little trial and error as I figured out the best way to loop the pages together and at the same time stay connected. I worked with two pages at a time; looping one, hot glue, loop the other and hot glue...repeat several times. Then came the part where I had to attach the pages to the actual book; which was not that bad just hot glue the pages to the binding.
I must apologize for the lack of pictures, I brought my camera home for the summer, but left the computer cord at the other house. Thankfully, I found another blog that gives step by step instruction for this project. Unfortunately, I discovered these instructions half way through me being done. 
I really like the way this book mobile turned out! This hanging book will be a nice addition to the reading corner in my room


Monday, June 4, 2012

DIY Wood Chalkboard

I originally came across this little jem on Pinterest and discovered where it originated Smashed Peas and Carrots
I had no idea where to get a tree stump and was about to venture out in the woods when Mrs. Hahn Daydreams told me I could find pieces of wood at Michael's. So instead of heading out in the woods I headed towards Michael's to gather supplies.
{What you will need}
Tree stump ($10)
Ribbon ($1)
Sponge brush (.25)
Tape (garage)
Chalkboard paint ($6)
Following suit of Smashed Peas and Carrots mom I created an outline with tape for the chalkboard boarder. Because Lord knows I cannot paint a straight line to save me life.
Then you paint once let dry for an hour
paint twice and dry for 24 hours
Finally after all that drying you can condition your chalkboard by rubbing a piece of chalk over the chalkboard paint. I found the colored chalkboard paint at Michael's. They also had other colors besides teal.
I plan on hanging this little jem in my classroom come the new school year